
How to Handle Common Bubble Chandelier Issues Like A Pro
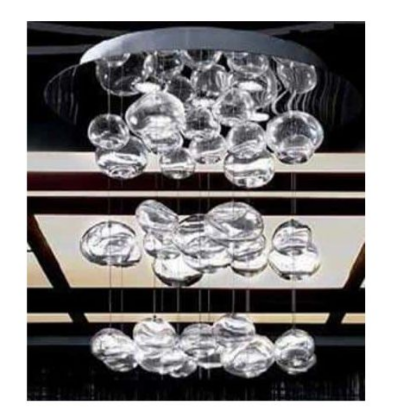
A bubble chandelier is more than just a light fixture. It’s a centerpiece that draws attention, adds character to your home, and builds a warm, inviting atmosphere. But let’s face it, like any beautiful piece, it comes with its fair share of quirks. From broken glass bubbles to finicky dimmer switches, these issues can seem like a headache—but they don’t have to be.
This guide will walk you through some common problems and practical solutions, helping you keep your glass bubble chandelier in perfect shape.
Broken or Damaged Glass Bubbles
Accidents happen. A bump with a ladder, a slip during cleaning, or even mishandling can lead to breaking of your glass bubbles chandelier. While it’s frustrating, replacing them is simpler than you might think.
Start by carefully removing the broken bubble. Use gloves to protect your hands and avoid injury. Once the damaged piece is off, inspect the attachment pins. If they’re bent, straighten them gently by hand. When you have a replacement bubble, slide it onto the pin until it fits snugly. Avoid forcing it, as this could strain the wire or pin.
If your chandelier is still under warranty, check with the manufacturer. Some companies offer free replacements within the first month or year, saving you both time and money.
Dim or Flickering Lights
Nothing ruins the charm of a bubble chandelier faster than lights that flicker or stay dim. This is often caused by an incompatible dimmer switch or an old bulb that’s past its prime.
Start by checking the switch. Most bubble chandeliers use LED bulbs, which require specific dimmer switches—like an ELV-compatible dimmer. If your switch doesn’t match, the bulbs might flicker, buzz, or stay stuck on low brightness. A quick swap to a suitable switch can solve the problem.
When replacing bulbs, handle them carefully. Ask a friend to help hold the glass bubbles out of the way to prevent any accidental damage. Once the new bulbs are in, give the fixture a quick test to make sure everything looks good.
Dusty or Dull Appearance
Over time, dust, smudges, and grime can dull the sparkle of your chandelier. Cleaning it may seem daunting, but it’s easier than you might think.
First, turn off the chandelier and let it cool. Always wear gloves to avoid leaving fingerprints behind. Use a soft and clean cloth to wipe away surface dust. For a deeper clean, lightly dampen a microfiber cloth with a vinegar-water mix or a solvent-free glass cleaner. Remember not to spray directly onto the glass bubbles, as this can affect the attachments.
If your chandelier hasn’t been cleaned in a while, take your time. Wipe each bubble individually and dry it with a soft cloth to bring it to its original shine.
Tarnished Metal Finishes
The metal finish on your chandelier plays a big role in its overall look. Whether it’s raw brass, polished nickel, or powder-coated metal, keeping it clean is essential for maintaining its charm.
For raw brass, which develops a patina over time, you can let it age naturally for a vintage look. If you prefer a polished finish, use a non-abrasive brass cleaner to restore its shine, then apply a coating of wax to protect it.
Polished nickel, on the other hand, requires a gentler touch. A damp microfiber cloth with a drop of soft dish soap works wonders. Dry it immediately to prevent water spots.
Powder-coated finishes, like black or white metals, are easier to maintain. A quick wipe with a soapy cloth, followed by drying, will keep them looking fresh. Avoid using abrasive cleaners on any finish, as these can cause damage.
Preventing Future Issues
A little maintenance goes a long way in keeping your glass bubble chandelier looking and working like new.
Regular Cleaning
Dusting weekly can help prevent buildup that leads to dullness. Use a feather duster or soft cloth to keep the bubbles and frame pristine. Every few months, give it a deeper clean to keep it sparkling.
Routine Inspections
Keep an eye out for loose connections, bent pins, or other signs of wear. If you’re unsure what to look for, calling in a professional for an annual inspection can save you from more headaches down the line.
Careful Installation
The installation process is where many issues begin. Make sure the mounting hardware is secure and the wires are connected correctly. Leave the bubble wrap on until the chandelier is fully installed to protect the glass. If you’re not confident in your skills, it’s always better to hire a professional for this step.
When to Call for Help
While most issues can be fixed on your own, some situations call for expert assistance. Persistent flickering, electrical problems, or structural damage to the chandelier are best left to professionals. They’ll have the tools and expertise to fix the problem without causing further harm.
Conclusion
Your glass bubble chandelier isn’t just a light source—it’s a piece of art. With a bit of care and attention, you can handle most common problems and keep it looking as stunning as the day it was installed.
Think of it like this: each bubble reflects light in a unique way, creating a magical effect that transforms your space. By addressing small issues promptly and giving it the care it deserves, you’ll enjoy its beauty for years to come.
Now, take a moment to look up at your chandelier. If it’s gleaming brightly, you’re already on the right track. If not, you know exactly what to do!